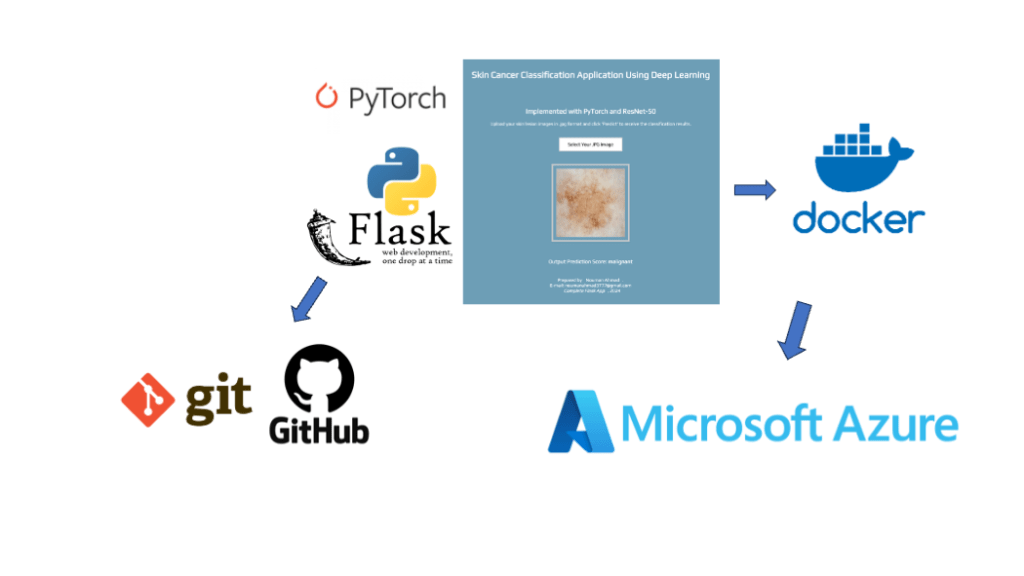
In this comprehensive blog, we will walk you through the process of creating and deploying a Deep Learning-based image classification project. We will focus on classifying skin cancer images into benign and malignant categories using modern technologies. The journey will cover training a deep learning model, building a Flask web application, managing version control with Git and GitHub, containerizing the app with Docker, and deploying it on Microsoft Azure.
Table of Contents
- Introduction
- Training the Deep Learning Model
- Building the Flask Web Application
- Version Control with Git and GitHub
- Containerization with Docker
- Cloud Deployment on Microsoft Azure
- Conclusion
1. Introduction
Skin cancer is one of the most common cancers worldwide. Early detection is crucial for effective treatment and improved survival rates. In this project, we aim to develop a web application that can classify skin cancer images into benign and malignant categories using a ResNet-50 model.
What You’ll Learn:
- Training a deep learning model with PyTorch
- Building a web application with Flask
- Using Git and GitHub for version control
- Containerizing the application with Docker
- Deploying the application on Microsoft Azure
dataset link: https://www.kaggle.com/datasets/fanconic/skin-cancer-malignant-vs-benign?resource=download
Directory Structure
/project-root
|-- app.py
|-- model.py
|-- requirements.txt
|-- resnet50_model.pth.tar
|-- static
|   |-- css
|       |-- main.css
|   |-- js
|       |-- main.js
|-- templates
|   |-- base.html
|   |-- index.html
|-- uploads
|-- Dockerfile
2. Training the Deep Learning Model
First, let’s train our deep learning model using the ResNet-50 architecture in PyTorch.
Step-by-Step Guide:
- Prepare the Dataset:
- Organize your images into
trainandtestfolders with subfolders forbenignandmalignantclasses.
- Organize your images into
- Train the Model:
import torch
import torch.nn as nn
import torch.optim as optim
from torch.optim import lr_scheduler
from torchvision import datasets, models, transforms
import matplotlib.pyplot as plt
import time
import os
import copy

# Define the data directories
data_dir = {
    'train': 'dataset/train',
    'val': 'dataset/test'
}

# Define data transformations for training and validation
data_transforms = {
    'train': transforms.Compose([
        transforms.RandomResizedCrop(224),
        transforms.RandomHorizontalFlip(),
        transforms.ToTensor(),
        transforms.Normalize([0.485, 0.456, 0.406], [0.229, 0.224, 0.225])
    ]),
    'val': transforms.Compose([
        transforms.Resize(256),
        transforms.CenterCrop(224),
        transforms.ToTensor(),
        transforms.Normalize([0.485, 0.456, 0.406], [0.229, 0.224, 0.225])
    ]),
}

# Load the datasets
image_datasets = {x: datasets.ImageFolder(os.path.join(data_dir[x]), data_transforms[x])
                  for x in ['train', 'val']}

# Define the dataloaders
dataloaders = {x: torch.utils.data.DataLoader(image_datasets[x], batch_size=16, shuffle=True, num_workers=4)
               for x in ['train', 'val']}

# Get dataset sizes and class names
dataset_sizes = {x: len(image_datasets[x]) for x in ['train', 'val']}
class_names = image_datasets['train'].classes

# Check if CUDA is available
device = torch.device("cuda:0" if torch.cuda.is_available() else "cpu")

import numpy as np
from torch.utils.data.sampler import SubsetRandomSampler

# Number of samples to load
num_train_samples = 300
num_val_samples = 100

# Create indices for the dataset and split into training and validation sets
train_indices = np.random.choice(len(image_datasets['train']), num_train_samples, replace=False)
val_indices = np.random.choice(len(image_datasets['val']), num_val_samples, replace=False)

train_sampler = SubsetRandomSampler(train_indices)
val_sampler = SubsetRandomSampler(val_indices)

# Define the dataloaders with the samplers
dataloaders = {
    'train': torch.utils.data.DataLoader(image_datasets['train'], batch_size=16, sampler=train_sampler, num_workers=4),
    'val': torch.utils.data.DataLoader(image_datasets['val'], batch_size=16, sampler=val_sampler, num_workers=4)
}

# Verify the sizes
dataset_sizes = {x: len(dataloaders[x].sampler) for x in ['train', 'val']}
print(f"Training dataset size: {dataset_sizes['train']}")
print(f"Validation dataset size: {dataset_sizes['val']}")

# Load the pre-trained ResNet-50 model
model_ft = models.resnet50(pretrained=True)

# Modify the final fully connected layer to match the number of classes
num_ftrs = model_ft.fc.in_features
model_ft.fc = nn.Linear(num_ftrs, len(class_names))

model_ft = model_ft.to(device)

# Define the loss function and optimizer
criterion = nn.CrossEntropyLoss()
optimizer_ft = optim.SGD(model_ft.parameters(), lr=0.001, momentum=0.9)

# Learning rate scheduler
exp_lr_scheduler = lr_scheduler.StepLR(optimizer_ft, step_size=7, gamma=0.1)

def train_model(model, criterion, optimizer, scheduler, num_epochs=25):
    since = time.time()

    best_model_wts = copy.deepcopy(model.state_dict())
    best_acc = 0.0

    train_acc_history = []
    val_acc_history = []

    for epoch in range(num_epochs):
        print(f'Epoch {epoch}/{num_epochs - 1}')
        print('-' * 10)

        # Each epoch has a training and validation phase
        for phase in ['train', 'val']:
            if phase == 'train':
                model.train()  # Set model to training mode
            else:
                model.eval()   # Set model to evaluate mode

            running_loss = 0.0
            running_corrects = 0

            # Iterate over data
            for i, (inputs, labels) in enumerate(dataloaders[phase]):
                inputs = inputs.to(device)
                labels = labels.to(device)

                # Zero the parameter gradients
                optimizer.zero_grad()

                # Forward pass
                with torch.set_grad_enabled(phase == 'train'):
                    outputs = model(inputs)
                    _, preds = torch.max(outputs, 1)
                    loss = criterion(outputs, labels)

                    # Backward pass + optimize only if in training phase
                    if phase == 'train':
                        loss.backward()
                        optimizer.step()

                # Statistics
                running_loss += loss.item() * inputs.size(0)
                running_corrects += torch.sum(preds == labels.data)

                # Print progress every 10 batches
                if i % 10 == 0:
                    print(f'Batch {i}/{len(dataloaders[phase])}, Loss: {loss.item():.4f}')

            if phase == 'train':
                scheduler.step()

            epoch_loss = running_loss / dataset_sizes[phase]
            epoch_acc = running_corrects.double() / dataset_sizes[phase]

            print(f'{phase} Loss: {epoch_loss:.4f} Acc: {epoch_acc:.4f}')

            # Deep copy the model
            if phase == 'val' and epoch_acc > best_acc:
                best_acc = epoch_acc
                best_model_wts = copy.deepcopy(model.state_dict())

            if phase == 'train':
                train_acc_history.append(epoch_acc.item())
            if phase == 'val':
                val_acc_history.append(epoch_acc.item())

        print()

    time_elapsed = time.time() - since
    print(f'Training complete in {time_elapsed // 60:.0f}m {time_elapsed % 60:.0f}s')
    print(f'Best val Acc: {best_acc:4f}')

    # Load best model weights
    model.load_state_dict(best_model_wts)
    return model, train_acc_history, val_acc_history

model_ft, train_acc, val_acc = train_model(model_ft, criterion, optimizer_ft, exp_lr_scheduler, num_epochs=5)

# Save the final trained model
torch.save(model_ft.state_dict(), 'resnet50_model.pth.tar')

plt.figure(figsize=(10, 5))
plt.title("Training and Validation Accuracy")
plt.plot(train_acc, label="train")
plt.plot(val_acc, label="val")
plt.xlabel("Epochs")
plt.ylabel("Accuracy")
plt.legend()
plt.show()
3. Building the Flask Web Application
Next, we will build a Flask web application to serve our trained model.
Step-by-Step Guide:
- Create Flask App:
from flask import Flask, render_template, request
import torch
import torchvision.transforms as transforms
from PIL import Image
from model import load_model
import os

app = Flask(__name__, static_folder='static', template_folder='templates')

# Define the number of classes (benign and malignant)
num_classes = 2
class_names = ['benign', 'malignant']

# Load the PyTorch model
model_path = './resnet50_model.pth.tar'
model = load_model(model_path, num_classes)
model.eval()  # Set model to evaluation mode


# Define image transformations
preprocess = transforms.Compose([
    transforms.Resize(256),
    transforms.CenterCrop(224),
    transforms.ToTensor(),
    transforms.Normalize([0.485, 0.456, 0.406], [0.229, 0.224, 0.225])
])

def preprocess_image(image_path):
    image = Image.open(image_path)
    image = preprocess(image)
    image = image.unsqueeze(0)  # Add batch dimension
    return image

def is_jpg_file(filename):
    return filename.lower().endswith('.jpg')

def evaluate(net, image):
    with torch.no_grad():
        output = net(image)
        _, predicted = torch.max(output, 1)
        return predicted.item()

def predict_value(image_path):
    try:
        image = preprocess_image(image_path)
        prediction = evaluate(model, image)
        return class_names[prediction]
    except Exception as e:
        print("Error:", str(e))
        return str(e)

@app.route("/", methods=['GET', 'POST'])
def main():
    if request.method == 'POST':
        file = request.files['file']
        if file and file.filename != '':
            if is_jpg_file(file.filename):
                img_path = os.path.join("uploads", file.filename)
                if not os.path.exists("uploads"):
                    os.makedirs("uploads")
                file.save(img_path)
                prediction = predict_value(img_path)
                return render_template("index.html", prediction=prediction)
            else:
                return "Please upload a JPG file."
    return render_template("index.html")

@app.route("/predict", methods=['POST'])
def predict():
    if request.method == 'POST':
        file = request.files['file']
        if file and is_jpg_file(file.filename):
            img_path = os.path.join("uploads", file.filename)
            if not os.path.exists("uploads"):
                os.makedirs("uploads")
            file.save(img_path)
            prediction = predict_value(img_path)
            return prediction
        else:
            return "Please upload a JPG file."

if __name__ == '__main__':
    app.run(host='0.0.0.0', port=8080)
2. Create HTML Templates:
templates/base.htmltemplates/index.html
3. Add Static Files:
static/css/main.cssstatic/js/main.js
4. Version Control with Git and GitHub
#Using version control is crucial for collaborative projects and tracking changes.
#Initialize Git Repository
git init

#Add and Commit Files
git add .
git commit -m "Initial commit"

#Push to GitHub
git remote add origin https://github.com/yourusername/your-repo.git
git push -u origin master


#Ongoing Development.

git add <file1> <file2> ...
git commit -m "Your commit message"
git push
5. Containerization with Docker
Containerizing your application ensures it runs consistently across different environments.
Step-by-Step Guide:
- Create Dockerfile
FROM python:3.9-slim

# Set the working directory
WORKDIR /app

# Copy the requirements file into the container
COPY requirements.txt requirements.txt

# Install the dependencies
RUN pip install -r requirements.txt

# Copy the rest of the application code
COPY . .

# Expose the port the app runs on
EXPOSE 8080

# Command to run the application using gunicorn
CMD ["gunicorn", "-b", "0.0.0.0:8080", "app:app"]
2. Build Docker Image and Run Docker Container::
docker build -t skin-cancer-webapp .
docker run -p 8080:8080 skin-cancer-app
6. Deployment to Azure Cloud
1. Push Docker Image to Dokcer Hub Registry (GCR):
docker tag skin_app_image noumannahmad/flask-webapp-skin-cancer:1.0

#If your app requires linux/amd64, you need to rebuild the Docker image \for the correct architecture. You can specify the target platform using the --platform flag:

docker build --platform linux/amd64 -t docker.io/noumannahmad/flask-webapp-skin-cancer:1.0 .
docker push docker.io/noumannahmad/flask-webapp-skin-cancer:1.0
2. Deploy to Azure Cloud Run:
Create account, and deploy the docker container.
7. Conclusion
In this blog, we covered the entire pipeline of developing a deep learning-based skin cancer classification web application. We trained a model, built a Flask web app, managed version control with Git and GitHub, containerized the app with Docker, and deployed it on Microsoft Azure. This comprehensive approach ensures that your application is robust, scalable, and accessible to users worldwide.
By following these steps, you can develop similar applications for various use cases, leveraging the power of deep learning, modern web development frameworks, and cloud services.
Gith Hub code link: https://github.com/noumannahmad/Skin-Cancer-Classification-Project-with-Flask-Webapp-Docker-Azure-Cloud